Friday, 30 April 2010
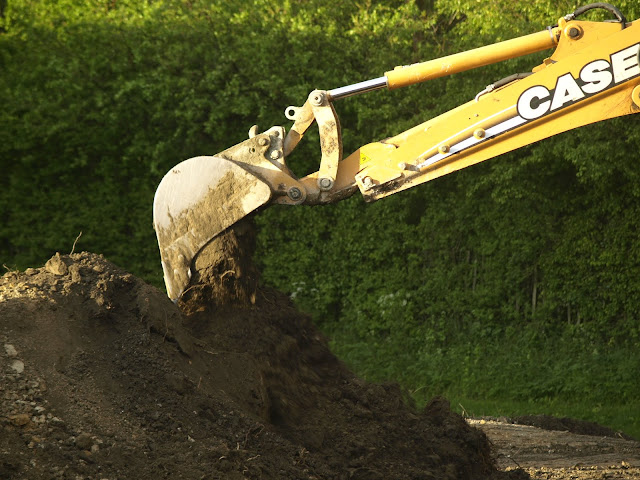
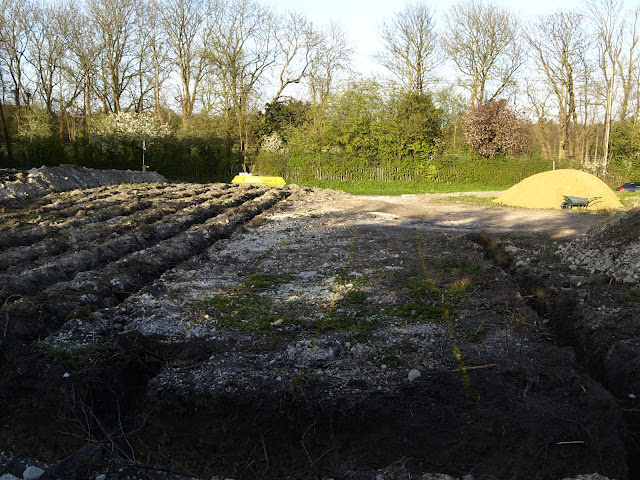
Almost there - excavating the last corner.
We needed the bottom of the excavation to be as level as possible, with not more than a 50mm variation across it. It was regularly checked with the level, but it was virtually excavated by eye within 15mm. Incredibly accurate, especially considering the soil variations. Well done!
Thursday, 29 April 2010
Wednesday, 28 April 2010
Today we are starting excavations for the new house. Our foundations are not traditional concrete strip foundations. Instead, we are excavating the entire footprint of the new house. We will then build up masonry walls directly off the chalk (that we are hoping to find when we excavate, like we did in the trial holes), which will act as our foundations and elevate our straw bale walls above ground level. Within the foundation walls, we will start our limecrete slab from the same excavated ground level.
Monday, 26 April 2010
Sunday, 25 April 2010
Day 14
Pressure had dropped to just under 3 bar today - which is fine.
All the sand is now backfilled, ready for filling in the trenches on Monday. It looks like a hell of a mess out there, so it will be nice to start tidying it up!
A massive thank you to family and friends for all their help over the last couple of weeks. We couldn't have got it done without them. Thank you all!
Saturday, 24 April 2010
Day 13 - Laying the pipe
We then pressure tested the pipe (we recommend a qualified plumber does this, who ideally is MCS registered). The pressure testing kit was supplied by Nu-Heat with the pipe. We got 4 bar of pressure which was good and there were no leaks - phew! We will now leave the pipe under pressure until we have finished backfilling all the trenches. It is advisable when backfilling to check the pressure gauge every 1/2 trench, so if you pierce the pipe and lose pressure you know where the damage occurred. The red marker marks the pressure at the start and the black pin will show the current pressure in the pipe. We expect the pressure in the pipe to drop a little bit, particularly as the temperature is close to freezing most nights at the moment. This is expected and does not mean we have a leak in the pipe.
Next task - backfilling with 100-150mm of sand over all the pipes.
The next task was to fill the pipe with water. We tried first just wedging the hose in the end of the pipe - which quickly became unwedged (and narrowly avoided soaking the camera!). So we applied one end of the pressure testing kit to the end instead and attached the hose with a jubilee clip. It took between 15-20 mins to fill all 400 metres.
We quickly ran into problems! The pipe was difficult to keep on the scaffold boards. Where it slipped off the boards the pipe would loosen on this part of the coil making it difficult to keep the pipe together and to wheel it forward. It also became difficult to slip the rope round the pipe as its self-weight caused the pipe to spread at the bottom.
We needed to leave enough of a tail of pipe at one end to enable it to reach into the house (which starts where the pile of sand is in the photo). We are locating the heat pump in the utility room. Ideally we would have located it outside the house, in the shed. However, the shed is going to be located where the bungalow is at the moment. Logistically it was difficult to locate the heat pump here because we would have had to demolish the bungalow before we were ready to move out into the new house. For this reason we opted for a Nibe heat pump, which are renowned for being very quite. They are also MCS registered heat pumps, so qualify for the 'Renewable Heat Incentive' which is under consultation at the moment but expected to come into force next April.
Renewable Heat Incentive: This is a government initiative similar to the feed in tariffs for PV panels which came into force in April of this year. More information can be found at http://www.rhincentive.co.uk/
Our trenches were very close to the propose new house, so we took our 400 metre length of pipe directly into the house. However, if you wanted to locate the trenches further away, or if you required more than one 400metre loop (the length required was calculated by Nu-Heat as part of the ground source heat pump design) you could bring the pipes into a manhole. Also supplied with the pipe loop are two 25 metre lengths of pipe which would be used to go from the manhole to the location of the heat pump.
Over the last week much thought has been given to how to lay the ground source heat pump pipe. We thought about uncoiling it by the side of the road and trying to straighten it out before feeding it from the road up into the trenches. However the access is now so bad from the road to the site (due to all the mounds of soil and sand) that we decided we would keep the pipe coiled and wheel it along the trenches on scaffold boards, uncoiling the pipe into the trench as we rolled it along.
We tied one piece of rope round the pipe in three locations (shortly reduced to two) that could slide round the pipe allowing us to uncoil it but still holding the pipe coiled together. We then cut the ties on the pipe.
The pipe had caps on each end which we taped to the pipe to avoid anything getting in the pipe.
Friday, 23 April 2010
Thursday, 22 April 2010
Wednesday, 21 April 2010
Tuesday, 20 April 2010
Monday, 19 April 2010
Friday, 16 April 2010
Looks like this corner of the site may have previously been used as some sort of dumping ground. There is lots of rubble and general builders waste, which seems to have been buried and filled in. It makes the edges of the trenches very unstable, and prone to collapse. This will be challenging to blind with sand tomorrow!
Subscribe to:
Comments (Atom)


