Sunday, 27 February 2011

Day 319 - More clay!


More clay rendering this weekend.  Yesterday rained again, which is becoming the norm for Saturdays!  Good progress today, we have now completed stripping off the frost damaged render and just need to patch in some cracks which have appeared in the render as it is drying.

Friday, 25 February 2011

Day 317 - Cladding the front elevation underway


Cladding begun on the front elevation yesterday.

Thursday, 17 February 2011

Day 309 - Guttering complete


Guttering complete on both sides.  The downpipes are yet to be fitted, once the cladding has been fitted.

Wednesday, 16 February 2011

Day 307


Guttering erected on 3/4 of the other side.

Tuesday, 15 February 2011

Day 306 - Guttering begun


...one side virtually complete


Putting up the aluminium guttering started today...

Sunday, 13 February 2011

Day 304

More external rendering today.  We finished the south elevation yesterday, and today we got from the road to the stair window on the north elevation.

We think the clay on the east (road) elevation has held up well under the poor winter weather conditions and does not need to be replaced.  We will do some final inspections next weekend, but our fingers are crossed!

Saturday, 12 February 2011

Day 303 - external clay finished on south elevation


Where we had to knock the render off, we took it back to the clay slip coat.

We have now finished rendering the south elevation, hopefully it will have a chance to dry this time!


Another example of where the frost has blown off part of the previous coat of render.  Whilst some of the render is still on the wall, it has lost its key to the render below.  It was sole destroying but we had to knock a lot of it off, particularly at high level.  If we hadn't knocked it off, it would have been pulled off by the application of the next coat of render.


We carried on with the external render today, we had to take off a lot of the previous coats as the frost damage was quite bad and large parts had fallen off.

Friday, 11 February 2011

Day 302


While we await more clay to continue with the external rendering, we spent a day carrying on with the hemp and lime insulation to the eaves, above the straw bales.

Thursday, 10 February 2011

Day 301 - first part of the internal scratch coat


We completed the internal scratch coat on the internal side of the straw bales in what will be the utility / plant room.  We will put studwork in front of this wall to fix all the plant back to shortly, so we want this to dry out quickly.

We have changed the mix of the clay render / plaster.  On the dry external plaster, when the clay was aggravated it 'dusted off' the wall.  This is undesirable, particularly on the internal walls, where we don't want a lot of plaster to end up on the floor everytime you touch the walls.  To try and avoid this we ave increased the quantity of clay in the mix.  The disadvantage of this is that will shrink more and may crack.

Wednesday, 9 February 2011

Day 300 - external rending resumed


We were back on the external rendering today.  We started on the south elevation, which was the last area we rendered before the freezing weather.  Since last year, some of the render had fallen off and a lot of it had lost its key from its backing and become very flaky and crumbly.  We had to strip back a lot of the old render before applying the new coat, which will hopefully escape the sub-zero temperatures this time!

We completed half of the south elevation today.

Tuesday, 8 February 2011

Day 299 - Internal clay slip complete


The new power mixer was at least twice as quick to mix the clay slip and ten times more comfortable!

As a result we finished all the clay slip!

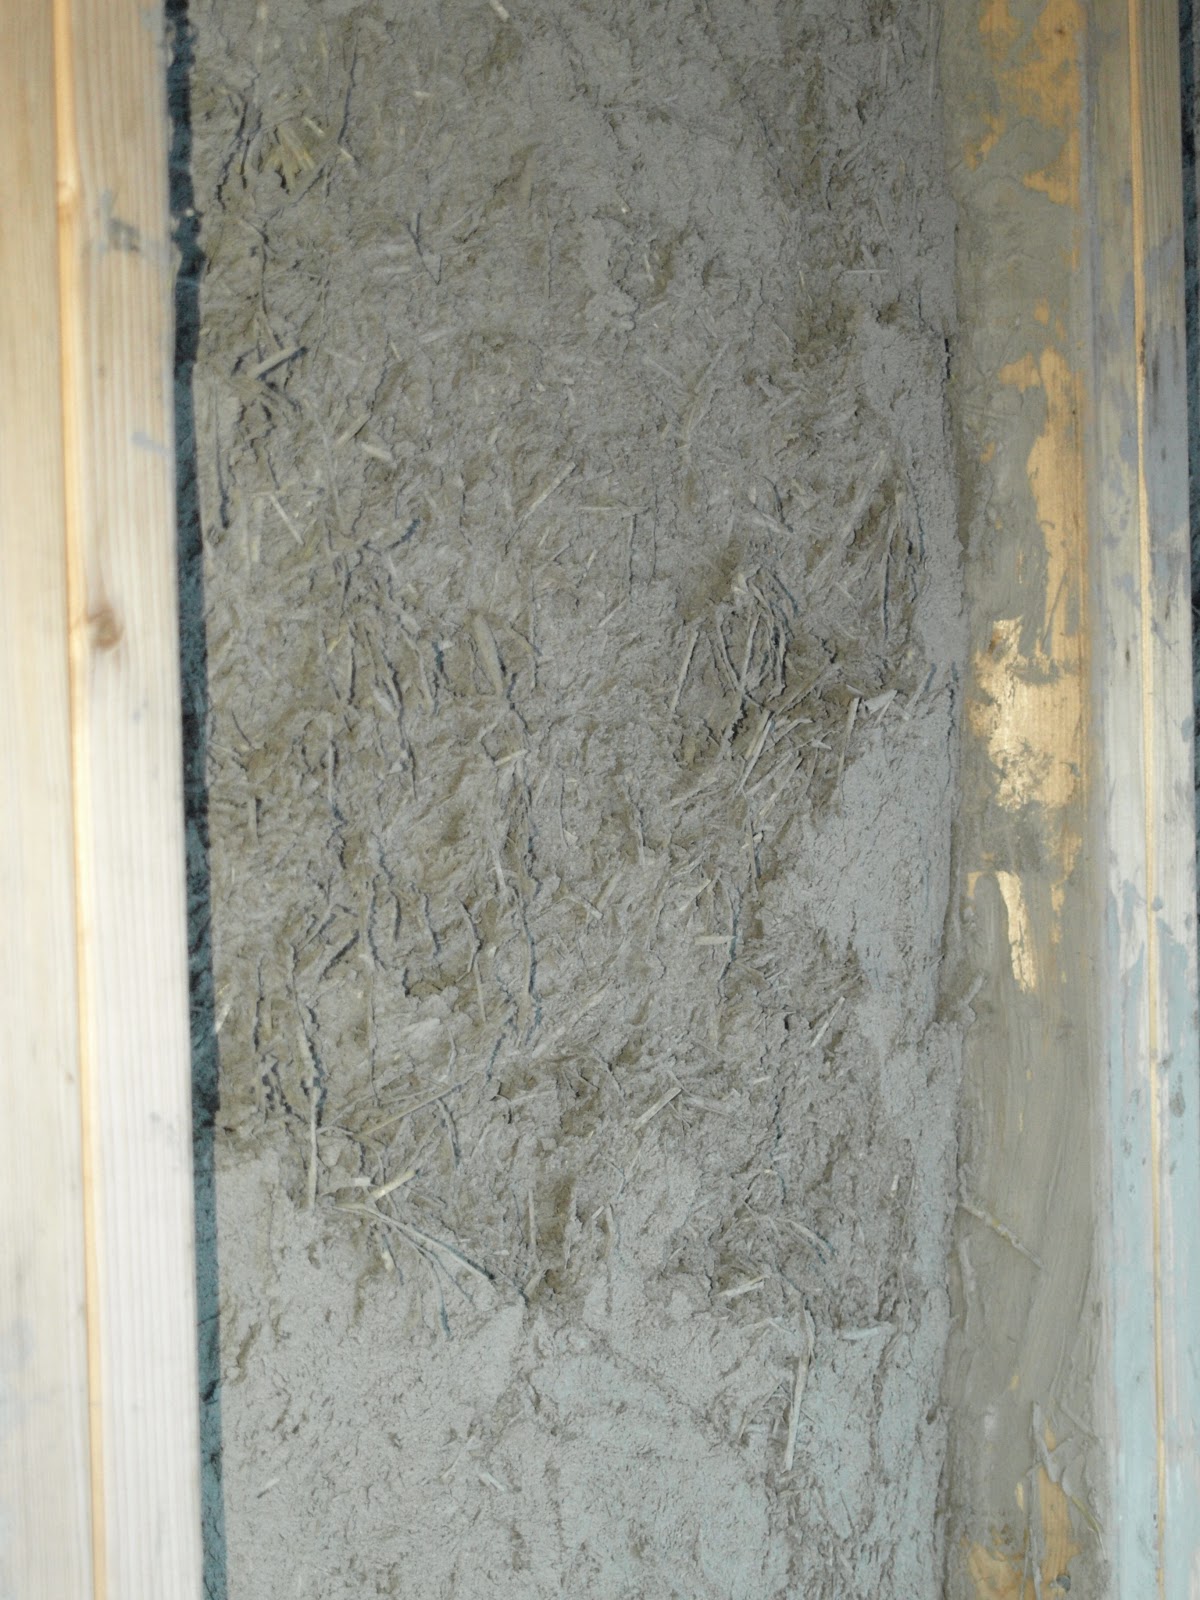
Having applied all the external clay slip by hand (rather than with the render gun), we reckoned it was about twice as quick with the gun.  Working the clay into the straw by hand was also quite hard on the fingers.  Having said that the gun was quite heavy to use for long periods of time!

We also had a go at applying the scratch coat with the gun (a mix of clay slip, sand and fibre).  Externally we used chopped straw as the fibre, however we did not think this would go through the render gun.  So we used hemp shiv instead.  It did go through the gun, however it was not very quick and we concluded a reasonable plasterer could apply it faster by hand.


The new power mixer has arrived!

Monday, 7 February 2011

Day 298


4.5 holes complete, only 71.5 to go!


So we made a start on filling the gaps above the first floor bales, between the rafters with hemp and lime insulation.


So we didn't manage to get much clay slip sprayed upstairs - we just about made it to the stairs.


The old drill finally packed in today, it definitely looks like it has seen better days!  It struggled with this red paddle as well and we had to settle for the small blue one, which was slow to mix.

Sunday, 6 February 2011

Day 297


This was our favourite, and the one we think we are going to go ahead with.  The sample has not had the final sealer / hardener on it yet.  The aggregate is recycled from the ceramics industry.